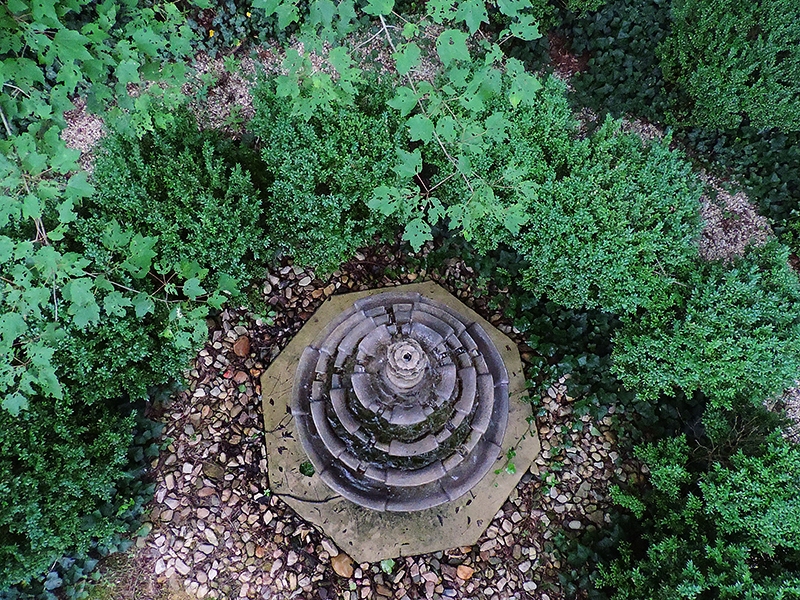
Today I did my first experiment with pole aerial photography, a technique I have been reading about for a while but never got around to trying. With this setup, you attach your camera to a pole that is anywhere from a few feet long to as long as you can manage. I have read that some people use poles as long as 18 feet (5.5 meters) or even longer. The technique often is used by real estate professionals to photograph properties from higher angles, in order to show the surrounding area better than could be done from ground level.
To elevate the camera, many people use painter’s poles or broomsticks. The pole I used, shown in the gallery of images below, is one that my family has had for more than 10 years; it is designed for attaching cleaning brushes and other devices for household maintenance, so you can reach light fixtures and other high areas in a house. I’m not sure how long this pole can extend, though it goes to at least 12 feet (3.6 meters).
The other thing you need is a way to attach the camera securely to the pole. I purchased a very nice adapter from a site called polepixie.com. The adapter screws on to the end of the pole, and has a tripod screw sticking up. I attached a standard ball head to the tripod screw, and secured the camera to the ball head. The result is shown in the first picture in the gallery at the bottom of this post.
The next step is to set up the camera to take pictures when it is several feet up in the air, out of your reach. There are several ways this can be done. One way is to use the 10-second self timer and press the shutter button, then quickly hoist the camera into the air. That approach probably would not give you enough time to get the camera aimed properly, and you would have to bring the camera back down to your level to press the shutter button for each image.
Another possibility is to use the Nikon Wireless Mobile Adapter, which lets you control the P520 remotely using an iPhone or Android phone. I have not tried using the wireless adapter for pole photography, though it should work. Of course, there are limitations with the use of the remote function. Specifically, the camera will take pictures only in Auto mode, and you cannot make many settings. But, you can take pictures using the phone, so it may be worth a try.
You also can rig up a remote device, sold at the polepixie.com site, which can trigger the camera mechanically. I have not tried that setup either.
The system I used for controlling the camera is the interval timer setting of the Continuous menu option on the Shooting menu. With that option, you can set the camera to take pictures at intervals of 30 seconds or longer, without any further action by you. I set the timer for the 30-second interval and then lifted up the the pole with the camera on top; the P520 then took one image every 30 seconds. With this system, you can use the camera’s many other settings, including the flash.
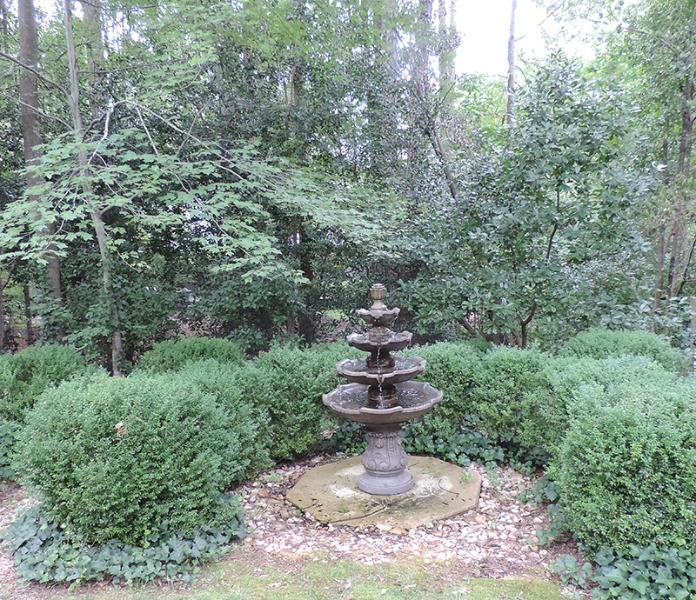
In the gallery below, I’m including a shot of the camera on the pole as well as a couple of views of a small garden fountain–one taken from ground level and one taken from the top of the pole, just to illustrate the use of the general technique. I will see if I can find some more interesting subjects for other pole shots in the future.


